
I’ve caught the “De-clutter Bug” this year! I started out by decluttering the top of my dresser. It took around 30 minutes, and I ended up with lots of things to donate.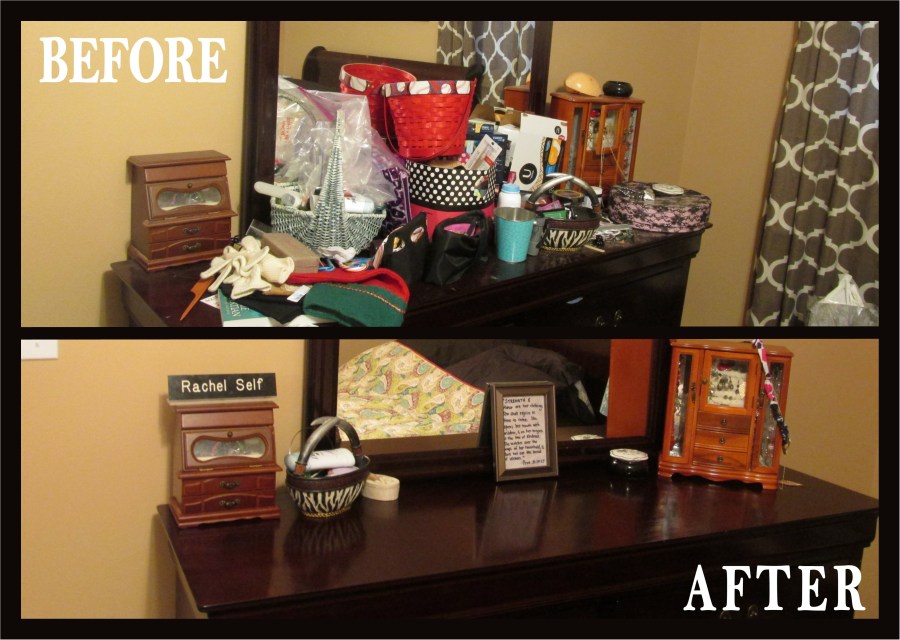
Wow! What a MAJOR difference it made in our room!
But….
I still wasn’t finished! See those necklaces hanging on my jewelry box? They were too big to even fit inside, and others inside were messed up and tangled like crazy. I hadn’t even looked inside the jewelry boxes during my de-cluttering, except to cram more stuff inside.
So on Monday I took about 20 minutes to de-clutter my two jewelry boxes! I ended up keeping 10 pairs of earrings, 12 necklaces, and 3 bracelets. That means that I was able to donate 14 pairs of earrings, 8 necklaces, 12 bracelets, and 2 watches! Do people actually wear watches anymore? I was also able to donate an entire jewelry box, and the little charm boxes on my dresser too–because everything now fit into my one large jewelry box.
Well….almost everything! I still had some necklaces that were too long, and others that could technically fit, but ended up getting tangled with other necklaces.
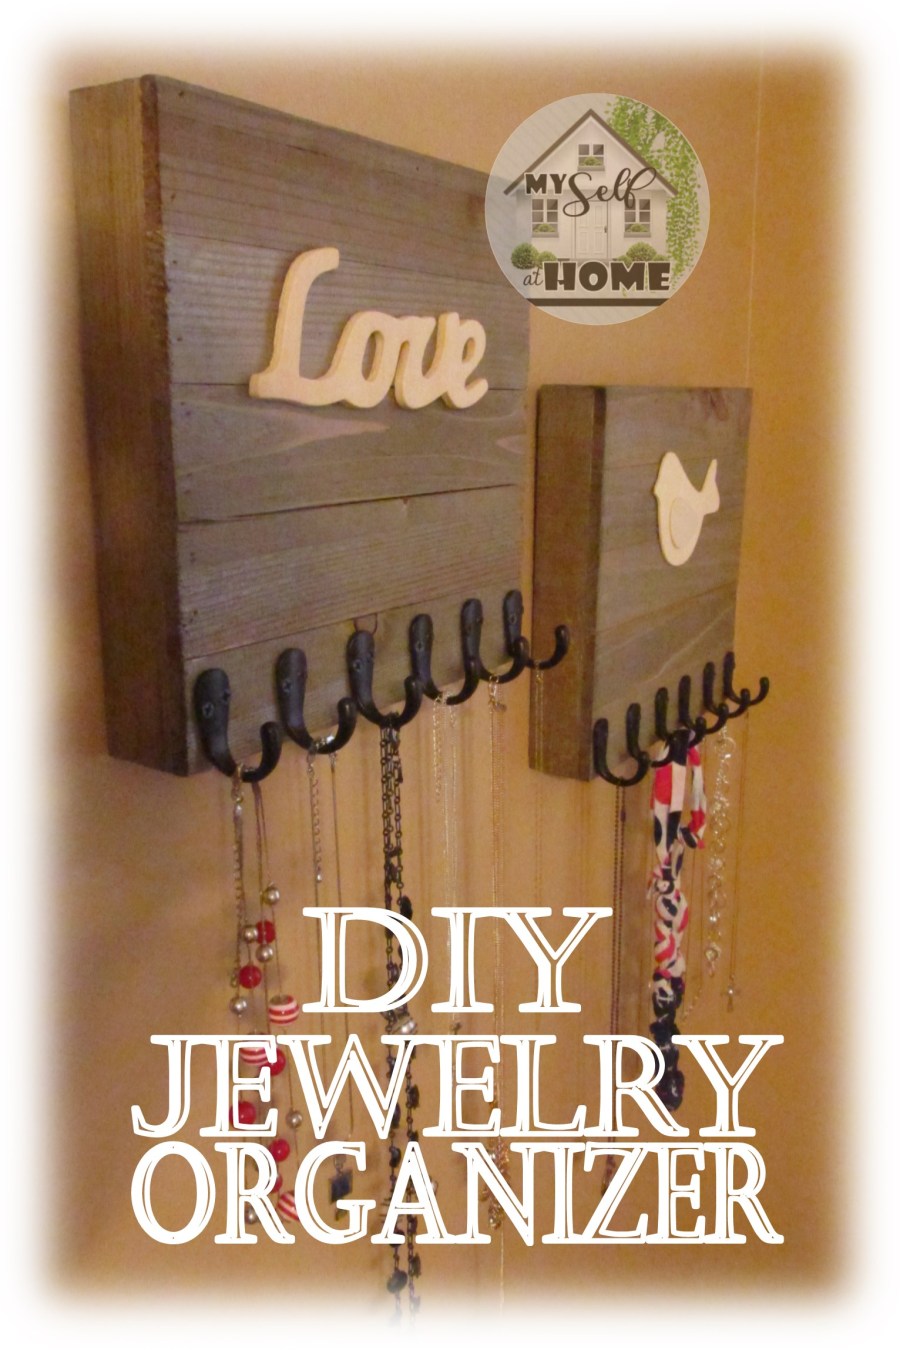
So, I then set out to make my very own “Jewelry Organizer!” I LOVE how it turned out, so I’m going to share a quick tutorial with you!
I grabbed all of these supplies for pretty cheap, at our local Walmart. If you live in an area with access to more craft stores, you would have even more options.
First, I gathered all of my supplies & tools:
 2– 10 in. x 10 in. Fake Wood Blocks
- 2–Cute Plain Wooden Shapes
- 2–Packs of Hooks, 6 Hooks each.
- Scissors
- Wood Glue
- A small paint brush
- Screwdriver
- Hammer
- 2 Nails
Next, I started by Gluing the Wooden Shapes to the Wood Blocks:
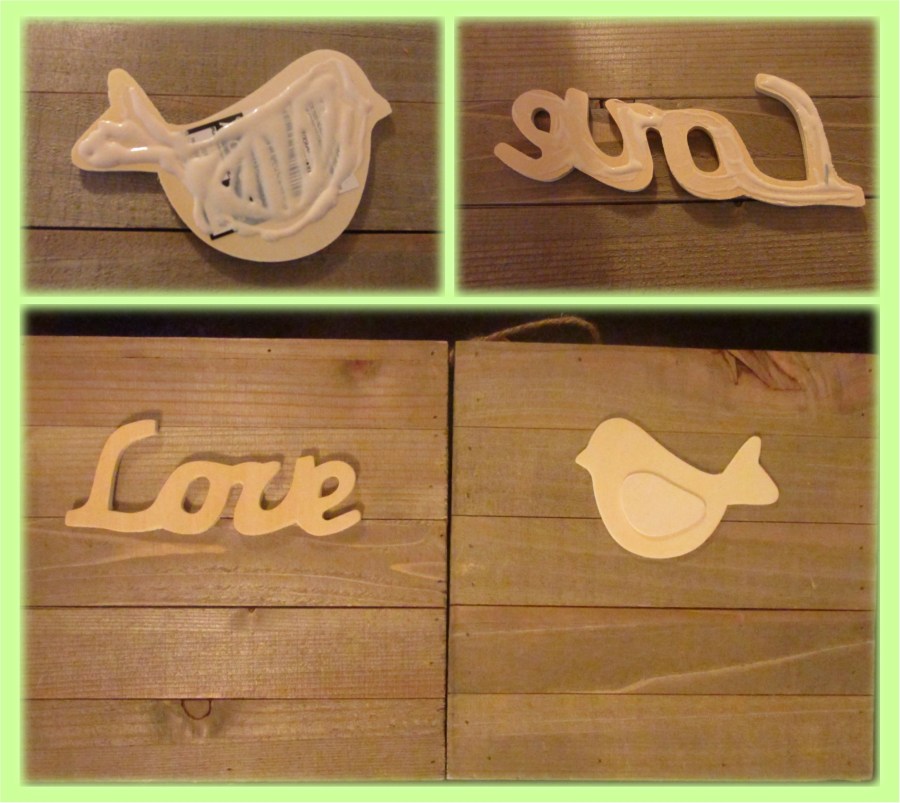
I used the small paintbrush to spread the glue evenly, and then pressed the shapes onto the blocks. I had considered painting the “Love” and the bird, or perhaps decoupaging some cute scrapbook paper onto them. But my husband really liked the two-toned wood look, so I kept them as is. As it turns out, I really like it that way!
After the shapes were on the boards, it was time for the hooks! I started by placing the hooks where I wanted them. I didn’t take the time to measure them; I just eyeballed the placement.

After the hooks were placed where I wanted them, I used the screwdriver to attach them.
I attached one screw through each hook first, and then was able to pick up the block for a better hold while I attached the second screw to each hook.
You could also mark the holes for each one so that you don’t have to worry about the hooks falling off, but…
Hindsight is 20/20, right?
Once the hooks were attached to the first block, I started over with the second block.
Then it was time to hang them on the wall! I chose not to hang them by the attached ropes, so that they would be more securely attached to the wall. There was already a plastic hanger on the back side that I could use with a nail.
Again, I did not measure for placement on the wall. I just “eyeballed” them and put them where I wanted them.
I think they turned out GREAT!

And the best part is that once I put my 12 necklaces on these, my jewelry box had room for all the things that didn’t fit before!
All the rings and bracelets from the other small jewelry box. AND all the bobby pins and safety pins from the small trinket boxes that had been on my dresser!
Now I can walk into my room, sit on my bed, and see a dresser that causes me NO STRESS. Instead, it brings a smile to my face because there is absolutely NO CLUTTER there to tie me down!

I am loving the freedom that comes with de-cluttering, and I’m not stopping here! Next up is my nightstand, and then on to the closet!


This is such a cute and clever idea!!! X
LikeLike
Thanks!
LikeLike
Cute! I don’t think I’ve seen that kind of wooden “box” before – where’d you get them?
LikeLike
The craft section at Walmart! They have a whole little section of wooden things. We don’t have a lot of stores here but if you have a Hobby Lobby nearby you would be able to find soooo many kinds of these things!
LikeLiked by 1 person
Hello! If you like jewelry, have a look here: https://www.etsy.com/it/shop/AtmosfereJewelry
100% handmade in italy!
LikeLike